Monday, August 28, 2017

Entry level whiskys, and drinkware


Thanks pretty much entirely to my group of friends I've been getting more into spirits lately.  I've had some good tequilas and gins (and some awful cognacs), but for now I'll be starting my adventure with whisky.

Lets get one thing out of the way.  American rules for spelling "whisky" are incredibly annoying.  Canadian and Scottish whisky's are spelled as such.  However American and Irish whisky's are spelled as whiskey.  There's some even more complicated line I don't understand where sometimes American "whiskey" is called bourbon, if it's made from primarily corn or something?  Plus it's also common to call Scottish whisky simply "Scotch", but only in America!?!?!

Fuck.

That's way too confusing.  I think the Scottish / Canadian method of spelling them all the same way is much simpler.  I'll be sticking to this unless referring specifically to the name of the whisky.  So lets just get that out of the way first.

All of these whiskys are good to me, and they're all a 4/4 on my current scale.  So instead of rating them, instead I'll post them in the order that I tried them, and describe their pros and cons. (I may have tried some others... but I never bought them, so I won't count them.)

After all of this if you are interested in what I think is the ideal type of drinkware, then just read on.


#1

Serpent's Bite

Country: Canada

This is a very sweet, and cheap, apple cider flavored whisky.

Actually that first line says almost everything that there is to be said about it.  This isn't a watered down whisky like jack daniel's apple cider flavored one that is only 15%ABV.  It kicks as hard as it is sweet.  And to me, this is a great balance.  Originally this whisky was shared to me by a friend.  Even after sharing it with others, I think everyone except for the regular whisky drinker liked it.

This is the downside.  It doesn't really taste like whisky.  It's a crazy strong apple cider whisky type thing.  It's awesome.  Maybe not the best entry point if you're specifically interested in traditional drinks.  But this stuff is cheap, less than $12 for a 750ml bottle.  I really don't have anything bad to say.

(sorry, not my picture)


#2

Canadian Club

Country: Canada

This is a smooth, cheap, and complex whisky.

As with the following 2 whisky's this was recommended to me by a friend on Twitter.  He said it was his "ideal entry level whisky" which is a good way to put it.  Easy to drink, complex in flavor, and affordable?  What more could you ask for.

It also comes in a brown bottle, which means you won't need to cover it with a cloth if you intend to drink it over a long period of time.  Usually more expensive whiskys come in clear bottles to show off their color instead.  So that's nice, I always prioritize practicality over fanciness.

Serpents bite is an awesome party drink for anyone to try out, but Canadian Club is a great drink to sip and enjoy over a period of time.  You could bring it to a party too though, not like it would cost you too much.  The price is similar to Serpents bite, ~$12.

(yeah I don't have any whisky glasses yet, deal with it)


#3

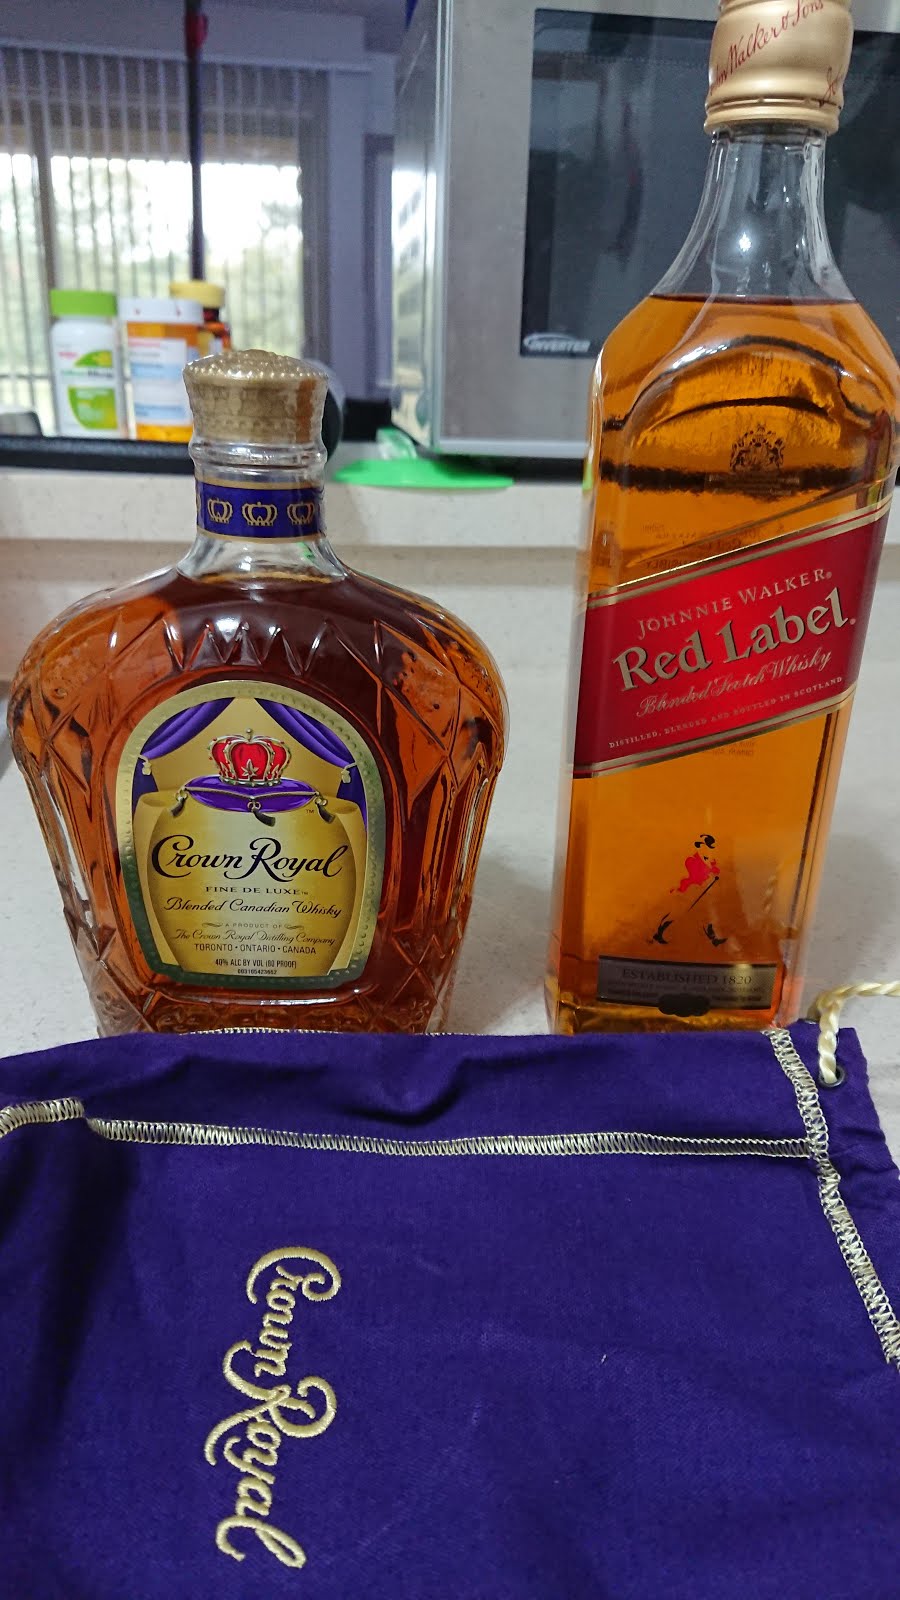
Johnnie Walker Red Label

Country: Scotland

This is a simple, strong, but still affordable and interesting whisky.

Red Label is the whisky that made me question what type of glassware to use for drinking whisky.  Initially I just put it into a wine glass (big red wine glass, burgundy style), in order to easily smell the aromas.  However, straight out of the bottle, and when drinking from a burgundy glass, this whisky will burn your nose if you inhale even at a normal speed.

That really put things into perspective.  When freshly poured, Red Label has a STRONG aroma.  It has a very strong, malt forward taste, that is so strong it kind of tastes like dirt.  But the good kind of dirt, not like Malort.

That said, freshly poured Red Label is pretty off-putting for the new drinker.  I tend to drink slowly over a period of time though.  And what I did find, is that after about 15 minutes, the flavor profile changed entirely.  It changed from being a hyper-aggressive malt-dirt flavor, to being more of a strong malt, with equally strong spice flavor?  That's pretty awesome.

So basically whisky aerates just like wine.  The effects are even more drastic, due to high alcohol content.  As alcohol evaporates (and probably other chemical things I don't understand) the flavor changes completely.  If you are like me and you prefer the aerated flavor of Red Label, using an aerator will cut down the aeration time from around 15 minutes, to closer to 5.

After aeration, Red Label is still a very strong spirit.  But it's awesome.  I really like it in that form.  My main complaint is that it's a little one dimensional.  Compared to the other 3 whiskys in this post though, it's the strongest flavor.  And to me that's pretty cool.

Price is ~$24.


#4 Crown Royal

Country: Canada

Awesome whisky... affordable, complex.  The flavor is good straight from pouring, and even 20 minutes later.

Out of the bottle, this whisky has a spice flavor nearly as strong as Red Label, but it's more complex.  The blended nature of this whisky feels very similar to Canadian Club, but it's a stronger flavor.

If you can hold off on drinking it long enough (man that's hard!), the spice flavor will chill out a bit, and the malt flavor of Crown will come out.

This means that not only is Crown awesome straight out of the bottle, but it's great even in a longer session.  Plus it has a more mild flavor, meaning more people can enjoy it.  On top of that, it's cheaper than red label ~19$.

This is an awesome bang for the buck, no one can go wrong with this drink.


WHISKY DRINKWARE

Based on my experience with these 4 whisky's, the only one strong enough to burn your nose in a wine glass is the Red Label.  What does that mean?  It means you want a wine shaped glass to properly capture the aroma of the whisky, so you can fully enjoy it.

As you can see above with the Crown photo, I did try drinking it out of a mug, which is more or less the same shape of a rocks glass.  Since Crown is less aromatic than Red Label, it was actually less enjoyable in this drinkware.  I've drank them both side by side in this mug, and there's no doubt the wine-style glass is ideal.  It's just too big.


The "Glencairn" is the official whisky glass.  It's basically an old fashioned burgundy glass, but smaller.  Perfect right?  Downside, I think it's too small.  On top of that, the traditional glencairn style is not a flat bottom.

What is the problem with not being a flat bottom?  What if you want to try out your spirits on the rocks?  Not with ice, with actual rocks.  You want a flat bottom so they won't easily scrape your glass.

Plus I like to drink larger quantities over a longer period of time.  This "Canadian Whisky Glass" is basically a glencairn without a stem, but bigger.  I think it will fit my needs perfectly.  It will still trap aromas and allow swirling.  But I can also pour more liquor, and use rocks if I so choose.

As stated above I do care a lot about the cupped nature of my whisky drinkware, but these huge burgundy glasses I have tend to leave a lot sticking to the sides, so it's a little wasteful.  I'm also scared to put any sort of granite or stainless steel rocks into them, since the bottom is not flat.

Braising cabbage, and homemade seasoned salt

I've been pretty busy with work the last few weeks, so I've been keeping my cooking more simple just to cut down on stress. Specifically I've learned a braising technique that makes excellent cabbage (and works on any types of veggies).

I also ran out of seasoned salt in the middle of the week and decided to whip up my own batch. It's based on a recipe I found online, but customized to my ingredient selection and taste. I'll share that recipe here.

This is a good combo post because seasoned salt is awesome for seasoning meat in a jiffy, and a side of braised veggies is (especially with something as filling as cabbage) really all you need for a complete, healthy, and delicious meal.

Seasoned salt also goes great on eggs, and cheese toast.  I use it that way for breakfast a lot because my brain is too dead to think hard.


Braised red cabbage, served alongside pan-fried drumsticks, seasoned with cracked black pepper, and homemade seasoned salt.


Generic cabbage recipe:

~1/3 of a large cabbage per serving after mixed with some veg

PREP
cut off just the dirty part of the root
peel the outer leaves that are damaged and covered in pesticide
wash the rest (wash it after chopping)
remove the root and dice it, cook it as if it were onions

SEASONING GREEN CABBAGE
(seasoning is per 3 servings)
* 3~4 md cloves of garlic crushed and chopped
* 1/2 lg or 1 md onion
* other veggies if desired (recommended: cauliflower, carrots)
* ~2 tsp chicken boullion
* 1~1.5 tsp chili flakes
* ~0.5 tsp cracked black pepper
* 0.5~1 tsp fennel seeds
* water as needed
* pinch of salt or as needed

SEASONING RED CABBAGE
(seasoning is per 3 servings)
* 3~4 cloves of garlic crushed and chopped
* 1/2 lg or 1 md onion
* other veggies if desired (recommended: carrots)
* ~ 2 tsp tomato boullion with chicken flavor
* ~0.5 tsp cracked black pepper
* spoon of dark fruit jam (i.e. blueberry or blackberry)
* water as needed
* pinch of salt or as needed


COOKING EITHER TYPE
heat a high edge pan on medium until hot
add generous amount of EVOO (~2 tsp per serving) and let it heat

add ALL THE VEGGIES
let them fry and caramelize slightly
add the water (start with around 1/4 cup per 1/3 large cabbage if not sure)
add all the seasonings
stir the top into the bottom regularly until it all wilts
once cabbage is nearly as tender as desired, taste test and adjust
add more water if more cook time is needed for tender cabbage

Braising green cabbage, this time with cauliflower.  A really easy and effective combo, I think.  I just let all the veggies brown a bit while adding the seasonings.

Frying some meat on one burner, while braising some cabbage on the other.  So easy :)

Green cabbage dish, served alongside dry marinated pork chops (just added more spices to Chef John's recipe, here: https://youtu.be/lVD7aVl4570 ).  I also made some homemade applesauce, using braeburn apples, cinnamon, nutmeg, allspice, and brown sugar.  Served it with some festbier.  It was an excellent meal :)  Those pork chops were a bit bigger than I thought they were, though.


Seasoned salt blend:

3 Tbsp idiozied salt
1 Tbsp tomato boullion with chicken flavor
2 tsp spanish paprika
1.5 tsp garlic powder
1 tsp fine cracked black pepper
1/8 tsp tumeric powder
1/8 tsp corn starch
pinch of sugar
pinch of white pepper powder


Just put it all into a bowl and whisk it together.


Use a spoon or a funnel to transfer into some spice containers, you can even re-use old ones if you want.  I thought mine was better than Lawry's though, so I didn't do that.

I'd like to point out that Lawry's seasoned salt contains a food coloring agent that makes their blend appear more colorful than it actually is.  You'll find that my blend has a less uniform color (the salt stands out more).  But at the same time, it's actually less salty.


Sunday, August 20, 2017

Chicken Pot Pie (in a cast iron skillet)

Chicken pot pie is an old favorite of mine.  I always remember loving it when I was a kid.  Even if chicken pot pie isn't your favorite I still recommend this recipe.  I've put a lot of effort into the flavor, plus it's very easy to cook.  You can't even compare this pie to something you would buy frozen at the supermarket.

I have developed a "chicken pot pie stew", which uses potatoes instead of a crust, but it's just not the same.  The taste is still good, but the taste of a homemade pie crust, in addition to the texture contrast it offers, is just too good to give up.  So for the time being, I won't be sharing that recipe.

However if you aren't interested in making your own pie crust, I will offer you some tips on spicing up the flavor of the crust so that it's still great.  If you ARE interested in making your own pie crust, I'll provide my recipes in the very bottom of the post.  Sorry but that won't have pictures for now, making dough is just too easy.

I will say that this pie is a little spicy as per my preference, but I only made it a mild~medium spicy to keep in spirit with the savory nature of the dish.  If you aren't good with spicy food at all, then remove the chili powder from the sauce at the end.  The chili flakes on the chicken I recommend regardless as it still adds really nice flavor.


Chicken Pot Pie recipe:


4-5 full meals

PREP
~2 lbs chicken
cut into 1/2"~3/4" cubes
marinate salt, coarse blk pep, chili flakes, and wine as needed to mix

1/2 lg or 1~2 medium onions chopped
~4 cloves of garlic smashed and chopped
~4 cups of frozen small vegetables out to thaw

Roll out pie dough and cover with plastic wrap
(when making pie dough for this recipe, knead it 1-2m so it firms up slightly)
(can use store bought pie crust if you find the type without crimped edges)

COOK
* Preheat oven to 400

* cook in 16" cast iron sauce pan
* get pan nice and hot so chicken can sear quickly, then reduce to medium
* heat high heat flavored oil (ghee or gingelly), add only as needed
* once chicken is done, remove to a bowl, leave behind grease
* for white meat, cook halfway. for dark meat, cook 3/4th of the way.

* add oil as needed
* add the onions and garlic. stirfry until just browned
* pinch of salt

* Add 1~2 Tbsp lard (or other fat) and mix it in to melt
* can substitute fat for oil, or remove as per your health needs
(the fat is just to help add body in addition to conducting flavor of the spices)

* Add frozen veg
* return the chicken
* add 1 big Tbsp knorr chicken bouillon
* ~1.75 cups of water, or as needed to reach desired thickness
* Add ~2 Tbsp cornstarch, slurried, stir immediately
* turn off the heat once the contents are all warmed, don't need to cook them yet

* 1 layer fine ground black pepper
* 1/2 tsp chili pdr
* 1/2 tsp cumin pdr
* 1/2 tsp GM pdr
* 1/2 tsp coriander pdr
* 1/4 tsp tumeric pdr
* 1/2~1 tsp dark soy or worchestershire sauce (or both)
* taste test and adjust
* optional: add a layer of onion flakes on top after stirring
(this will help keep the crust dry and add flavor, you can also add other things like garlic powder)

* use arms or board to carefully place crust over skillet
* seal edges and fold big hangovers back over the top
* use some egg yolk, or milk wash to cover the whole crust
   (another trick is to add salt or other seasonings to the wash)
* poke big holes in the middle, moving outwards so the dough doesn't mix in with the filling and re-clog the hole

* bake for 30 minutes or until crust is golden
* let cool before eating


Prep for chicken pot pie is incredibly easy.

Rolled out my pie crust.  I'm not very good at it, so I usually have to tear off some pieces from the outside to patch up parts that are lagging behind.  You can just patch them on with water.  Make sure that it's big enough by holding your skillet over it before you finish.

Searing, and partially cooking the meat.  I used light chicken meat this time, so I won't cook it too much, allowing it to keep a juicy texture at the end.

Chicken is done, so I removed it and am browning the onions and garlic.

This is done enough.  Once they are all translucent they will mostly dissapear into the pie.  You can adjust to more or less cook time as per your preference.

Pie filling with all of the water, seasonings, and thickener added.  If you want more filling you can add more water, thickener, and seasonings.  I like doing it with this amount and not too much thickener, because it makes it easy to prevent the filling from boiling over onto the crust.

Throwing down the onion flakes because I love my crust.

Didn't do anything fancy with the crust.  If you have a wetter pie filling, you'll need to seal it much better than this.

Egg washed, got some on the edges too.

Cut holes with a paring knife.

All done :)  The hardest part is resisting eating it while it's too hot.


Pie Crust recipe:

2.5 cups AP flour
1 tsp salt
1 tsp sugar
mix

1 cup (16 Tbsp) of butter and/or lard and/or shortening combination
(note, you can round down on lard amount since it contains less water)
cut into small pieces and add
mix until pieces are small peas
(alternative, do all of that in a food processor)

ice some cold water
very gently mix 6-8 Tbsp water (note: the more lard is used, more water is required)
test dough to see if it stays together by squeezing a part of it
add a little water at a time until this happens

optional: if more elastic dough is desired, knead it slightly, 1-2 minutes at most

gently form into rough ball, divide in two
gently form both portions into discs
put into plastic bags and remove air, or plastic wrap
put into fridge for 1 hr

roll out as needed with flour, no harm in moving around dough to maintain a circle

NOTES:
* for making chicken pot pie crust, since it's not for sweets, I like to add more seasonings
* I used brown instead of white sugar, garlic powder, and some extra salt
* I also used a combination of Ghee and Lard for the fat